Sunday, January 20, 2013

Farmhouse sink


It has been a bit of a dry spell on the Lake house improvements front. I think everyone (from my contractors to our own family) ran out of steam after the big Thanskgiving push. However, my lovely in-laws visited the cabin today and sent this picture of the newly installed farmhouse sink and oak butcherblock countertops. So excited!

We had brought the DOMSJO sink from IKEA (only $189, what a deal!) and the countertops down when we came in November. We thought about installing everything ourselves for about two days, and then we regained our sanity and hired people to install everything. Phew. Best decision ever.

Apparently I need to start thinking about backsplash options now....We next plan to visit in March. I can't wait to get cooking in my new kitchen! 

Sunday, November 18, 2012

Curtains


We are headed down to the lake tomorrow for a Thanksgiving celebration. I made curtains out of red ticking for the upstairs bedroom tonight, roughly following this tutorial. Nothing like waiting until the last minute! It should be a very lovely time, with lots of family and food. I am very excited to see all the renovation progress as well. Not all the things are as complete as I wanted (i.e., the kitchen tile is not installed, the wood floor has not yet been sanded and stained), but I am embracing the process.

Sunday, November 11, 2012

Ships at sea


I found this painting on Craigslist. It was in a small little town about two hours away, but I made a detour from a work-related roadtrip to see it. After a little negotiation, I paid $60, which was probably too much given its condition. When I got it home, my husband grimaced because it was so yellowed with tobacco stains and age. I briefly researched oil painting restoration techniques and then quickly settled on a very rough do-it-yourself approach to cleaning it. I figured that if I destroyed the painting, I would not have lost too much in the trying....

I first rubbed the painting with a cut potato, which supposedly pulls out the dirt. That did not seem to make a noticeable difference, though, so I skipped to a more direct approach: dishsoap and warm water followed by a wipe down with rubbing alcohol. It worked like a charm. The old yellow tinge came off and the painting was not visibly harmed. I am sure it will not last for generations, but at least it was saved from the trash.

I then cut the painting down to fit an existing canvas that I had in the basement. I glued the painting to the front using basic craft glue. Then I used a staple gun to secure it, folding the edges around the sides of the canvas. I am not sure where I will put it in the cabin, but surely it will fit somewhere! You cannot get a sense of scale in these pictures, but it is quite large - about 2 feet by 4 feet long.


Friday, November 9, 2012

Chairs!


My wing chairs are ready to be picked up! I am so excited. I ordered them from an Etsy shop called Urbanmotifs. She finds old chairs and recovers them in modern fabric.  My parents are picking up these two babies tomorrow and then bringing them to the lake house when they come on Thanksgiving. Speaking of which, there has been a LOT of activity happening at the house. New hardwood floors, new paint, new tile, new carpet.... I have been promised that it will all be done by the time we arrive next Monday evening. Let's hope so! At least I know we will have chairs.


Monday, October 15, 2012

Chalkboard Fridge


One of our weekend projects was to paint the refrigerator with Chalkboard paint. It turned out super cute. I  was not sure how much paint was needed, so I overbought (again). It turns out that one 30 oz can is more than enough for a fridge. For the first coat, I used a brush, but I switched to a roller for the second coat and it looked a lot better. The hardest part of the whole thing was removing the inner plastic doors and the rubber seals so they would not get painted. That involved unscrewing and then replacing about a million screws. At least now I know how a refrigerator is assembled.  

After you paint it, the fridge has to dry for three days before you can use chalk. I asked my in-laws to stop by the cabin when they next visited the boat to do the final step. Sweet people that they are, they agreed.


 Before you can write on the surface, you have to rub chalk all over it evenly to "cure" it and then wipe it down with an eraser and a dry rag. Then you can write or draw to your heart's content. I have not seen the final state yet, but I am very excited to let the kids loose on it for Thanksgiving. A $15 can of paint plus a brush and a roller. Not bad for a new fridge look. 
  

Saturday, October 13, 2012

Before: The kitchen


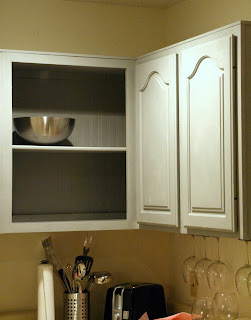
I unearthed some "before" pictures of the kitchen. As you can see, faux ivy and wooden fruit lined the top of the cabinets. That shtuff was the first to go. On our last night in the cabin, Hubby opened a second owner's closet and found that it was full of extra ivy and another brass lamp. After our weekend long battle with fake plants and brass accents, this discovery made us laugh like crazy people.


So much better now, but still a long way to go. We picked out tile today at Home Depot so the contractors can install the floor before we arrive for Thanksgiving. The next thing to pick up is the butcher block countertops, farmer's sink and faucet (all from IKEA). That will be installed in late November since we have to drive it down. I am learning much patience with this project.


Wednesday, October 10, 2012

Brass lamp re-do


Brass begone! The cabin had three brass lamps which were tarnished and past their prime. I brought a high-temperature spray paint to cover the brass trim on the fireplace. When I saw these puppies, I spray painted them as well. It was quick and easy. 


I will likely add a gloss finish to these lamps when I come back at Thanksgiving, but I am pleased with the transformation thus far. Now I just need more spray paint to cover the brass headboard....